Monday, June 25, 2018

Protective Style Prep


 I love styling my hair. I love discovering new products and new methods of getting my hair to behave the way I want it to behave. I also love watching it grow and move through the different phases of each style. 

The love of my hair leads me to wash and style frequently in an effort to maintain its health and beauty; and as much as I love the process I sometimes need a break. Lately I've been looking at my hair and feeling like it isn't growing as quickly as it did the first time I was natural. I get my hair straightened and trimmed every three months and I've been able to clearly see growth, but when my hair is in its natural coily state it just doesn't seem like I've made much progress in the area of length retention.

In short I've come to a point where I am overly concerned with my hair and picking apart every little aspect of it. As they say "a watched pot never boils" so I've decided to tuck my hair away for a while to give myself a mental and physical break from my hair.

Preparing My Hair


To prepare my hair for long term styling (I plan to keep my braids for at least four weeks) I wanted to be sure to infuse moisture into my strands while also strengthening my hair for my first attempt at a home blow out.

Shampoo & Condition

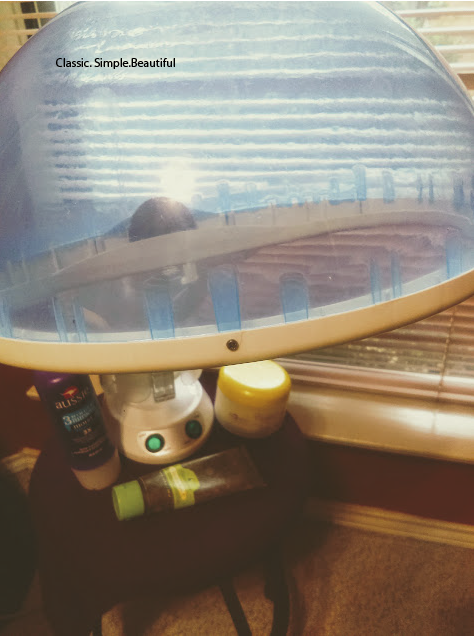
I began by first shampooing my hair twice with Aphogee Keratin & Green Tea Shampoo. I chose this shampoo because I would be applying heat and I wanted the additional infusion of keratin to protect my strands from the blow dryer. After shampooing I applied my moisturizing conditioner (Aussie Moist 3-Minute Miracle) and thoroughly detangled using my paddle brush. I rinsed after 3 minutes than applied my Macadamia Oil Deep Repair Mask and sat beneath my steamer for 30 minutes.

I allowed my hair to cool down after steaming, then rinsed and proceeded to moisturize and prep for blow drying.

Moisturizing & Blow Drying

To moisturize my strands I used my Jane Carter Solutions Curls To Go Untangle Me Leave-In Conditioner as well as the Mist Me Over Hydrator from the same line.  Where I would typically use a quarter-sized amount and simply finger comb the product throughout my strands, this time I sectioned my strands into four quadrants and added a quarter-sized amount to each section. I then brushed the product through with my paddle brush to ensure even distribution. Because I intended to use heat to stretch my hair for the braiding process I also applied a dime sized amount of Kera Mineral's Smoothing Leave In Conditioner to each section as a heat protectant.


I used a combination of the tension method, the comb method, and the flat brush method to blow dry my hair and ensure maximum straightness. Working with small one inch sub sections within each quadrant I applied the tension method by gently pulling the section downward and running the blow dryer (with concentrator nozzle) downward to stretch and dry the section. Once the section was about 90% dry I then used my flat brush to apply greater tension and further straighten each section. I honestly could have stopped here but I ran the blow dryer one last time down my strands and chased it with my wide tooth comb simply to be absolutely positive that my hair was dry, stretched, and thoroughly detangled. 

This entire process took me about 40 minutes and I realized that my hair is not nearly as coarse and unmanageable as I have always thought it to be. I have always been somewhat intimidated by the density, thickness, and tightly coiled nature of my strands, and assumed that because it didn't 'look' easy to manage in the same way as my relaxed hair that it would be difficult to blow out and straighten the way I did my relaxed hair. I was clearly wrong and have a new understanding of my hair and what it is capable of.

Once my hair was completely dry I added a dime sized amount of Jane Carter Solution Curl Defining Cream to each quadrant for extra moisture then secured each section with a ponytail holder to keep it stretched and prevent tangling. Due to my preparation the braiding process was quick, easy and virtually painless. 

How do you prepare for a protective style?


Tuesday, June 19, 2018

Summer Wash Day Routine for Naturals


This Summer my goal is to keep my hair routine simple while maximizing moisture and maintaining length. To reach these goals I am instituting two main elements into my routine: Wash and Go's and Low Manipulation styles. Both style choices require similar wash day prep and the routine I have created has been instrumental in maintaining moisture for days at a time and limiting manipulation.

Whether I am protective styling or doing a wash and go my routine contains the following elements:

Cleansing

One thing I have learned as a second-time natural is the importance of a good quality shampoo and how regular shampooing aids in the health of both your scalp and hair. As I mentioned in my MHM Review post, I do still use a clay cleanser but it is accompanied by a quality shampoo. Depending upon the week and my hair's needs I alternate between a protien/strengthening shampoo, a moisturizing shampoo, or a clarifying shampoo.

Prior to shampooing I do not dentangle, add oil, or do any sort of pre-poo step; I simply jump in the shower and allow the water to run through my strands for 1-2 minutes. Once my hair is weighed down and fully wet I apply my shampoo. I currently have three shampoos in my rotation: Carol's Daughter Black Vanilla Moisturizing Shampoo, Kinky Curly Come Clean, and Aphogee Green Tea & Keratin Shampoo. I have found that all three of these aid in detangling so once my hair is lathered I do a quick finger detangle with the shampoo still in before rinsing.

If I am using a clay mask I will apply the mask to my hair and use it to further finger detangle my strands. I do not allow the mask to sit for longer than five minutes. If I am not using clay I will lather a second time with shampoo to insure  my hair and scalp are completely clean before I proceed to conditioning.

Conditioning

Rather than alternating between a protein and moisturizing conditioner each week I've opted to use both on every wash day. However, my hair's needs for the week determine which conditioner I use as a deep conditioner with my steamer. I currently have four conditioners in my line up: Aphogee Keratin Two Minute Reconstructor, Aussie Moist Three Minute Miracle, Aphogee Curlrific Texture Treatment, and Macadamia Natural Oil Deep Repair Mask. While still in the shower I apply my rinse- out conditioner and allow it to sit for a few minutes while I do my shower duties. After rinsing, wringing out excess water, and wrapping my hair in a t-shirt I prep my steamer for use. Once I apply my deep conditioner of choice I use a paddle brush to completely detangle my strands before sitting beneath my steamer for 30 minutes. I like to allow my hair to cool before I rinse out my deep conditioner, just to allow my cuticles to close naturally. After cooling and rinsing my DC I wring excess water from my hair and allow my t-shirt to dry my hair before I apply my stylers.


Styling

I have only recently perfected my wash and go process and found the proper stylers to keep my hair moisturized while making my curls pop. To prevent product build up (and save money) I keep very few stylers in my stash and apply a minimum of two products. I begin by applying a moisturizing leave in on damp hair. My current leave-ins are Jane Carter Solutions Curls to Go Untangle Me, and Kinky Curly Knot Today. I apply about a quarter sized amount of leave in throughout my strands and work it through using my fingers to rake and smooth. Because my hair is still so short I don't bother sectioning but I do make sure to apply the product evenly throughout my strands. My current styler of choice for definition, moisture and hold is the Aphogee Curlrific Curl Definer. I intend to do a full review of this product but let me just say it is AaaaMazing!! When applying the curl definer I do work in sections (although I still do not part my hair) and apply about a nickle sized amount working it in generously, making sure to rake and smooth the product in until I see my coils and curls begin to separate and elongate. After the product is completely applied, if my curls still aren't clumping the way I know they are capable, I will either re-wet my hair with a spray bottle or dip my hair back beneath the shower head. The final step is a good shake to further encourage clumping before applying a clean t-shirt to soak up excess water for 15-30 minutes to speed up the drying time.

 
Day 5 Results


I am currently rocking a protective style for the month (post coming soon) but prior to install I was doing wash and gos weekly. With the aforementioned routine and products I have been able to stretch my wash days for a full five (sometimes six) days! This is huge for me because with my prior product choices I could only manage to go three days between washes because my hair would quickly dry out. With this routine not only am I getting great curl definition and lasting moisture but I am able to style my hair in under an hour leaving my free to enjoy my weekend. What else can a girl ask for?

What is your Summer Wash Day Routine?

Thursday, May 17, 2018

Quest for Curls - The Max Hydration Method (Modified)

Prior to returning natural in February of 2017 I spent months scouring the internet looking for a way to get my natural curls popping without having to spend hours on wash days twisting my hair (only to re twist it every night). I knew that my wool was capable of curling on it's own but I was at a loss as to which products and techniques to employ that would encourage my curls.

My research lead me to what is known as the Maximum Hydration Method. Having been natural from 2010-2013 I was somewhat familiar with the use of Bentonite Clay to encourage curls, and had even tried it in the past but failed to see any results. Several bloggers and vloggers with type 4 curls shared their experiences with and their results of the Maximum Hydration Method, and I was confident that I too could get popping natural curls if I implemented that same method. As I mentioned in my return post, I spent a short three months transitioning and used Bentonite Clay as my cleanser during that time. Once I removed my braids and cut off the small amount of remaining relaxed ends I jumped headlong into the full Max Hydration Method (MHM).

What is the Max Hydration Method (MHM)?

For those of you who may not be familiar with the MHM I will provide a brief summary.

 MHM is a method of hair care cleansing, conditioning and styling that is touted to improve moisture levels in the hair strand thereby encouraging clumping and curling of type 4 hair. The method essentially evolves four steps that are to be done for seven consecutive days, then once every 3-7 days until maximum hydration levels are reached. According to the creator of the method, maximum hydration is reached once a single strand of hair curls from root to tip without the help of styling products. Steps of the MHM include:
  1. Cherry Lola Treatment - A mixture of full fat, plain, organic Greek yogurt; Braggs Amino Acids; and 1 Tbs baking soda. Mixture is applied to damp hair and allowed to sit for 30 minutes beneath a shower cap or plastic bag. 
  2.  Clarify - Once the Cherry Lola Treament is rinsed out clarify your strands using either an ACV rinse or Baking Soda rinse.
  3. Deep Condition - After cleansing deep condition with a quality conditioner that does not contain silicone. 
  4. Clay Treatment - Mix bentonite clay with apple cider vinegar (ACV) and apply to damp hair. Cover with plastic cap and allow to sit for 15-30 minutes. 
  5. Leave In Conditioner and Botanical Gel to seal and set - after thoroughly rising the clay apply a quality leave in conditioner and botanical gel (recommend Kinky Curly Knot Today & Curling Custard). Allow hair to air dry or diffuse.
Note the Cherry Lola step is only done on the FIRST DAY you begin the MHM. On days 2-7 begin with Step 2 (Clarify).

My Results with MHM

I noticed immediately that my hair did not like the Cherry Lola Treatment and I truly believe it was due to the use of baking soda. This step left my hair dry, brittle, and frizzy. After further research I discovered that when used over a long period of time baking soda can cause harm to the hair strands. Knowing the potential for harm along with the results I experienced lead me to cut this step completely from the Maximum Hydration Method. 

For steps 2 - 7 I made the following adjustments:

  • Step 2: Opted to use a ratio of 3 parts water and one part ACV to clarify
  • Step 3: Used Kera Minerals Deep Conditioner although it was not silicone free. I found this conditioner gave me excellent results. 
  • Step 4: Followed clay making steps per MHM creator's instructions
  • Step 5: Used Kinky Curly products to seal
The results after seven consecutive days of performing all five steps was a head full of soft and moisturized curls, kinks, and coils. Once the seven days were complete I moved on to performing the MHM every 3 days for a period of eight months. In all honesty I did experiment with Wetline Xtreme gel (this is NOT recommended as it is not a botanical gel) because the curling custard was not helping my hair to hold it's curls.

After eight months I finally visited my stylist for a trim and she talked me into getting a protein treatment known as the BASIC One Step Treatment that is supposed to improve manageability of tightly coiled hair (I will provide a run down of this treatment in a later post). Obviously to properly trim my hair my stylist had to blow dry and flat iron my strands and it was at this time that I saw the true effects of the MHM on my hair. It took her six hours to blow out and flat iron my hair and at the time I had a small TWA. The process was painful and as she worked the tools through my hair I could see my strands falling around me. She ended up having to remove almost 4 inches of my hair and I will never forget her surprise as she asked "What have you been doing to your hair?!" My hair was a dry, gnarled, crispy mess! My ends were eaten up with split ends and single strand knots; I have never seen my hair look that bad.

After that visit I immediately quit the MHM and have been using quality shampoos and conditioners since. Three months later I visited my stylist again for another trim and it took her 2 hours to blow dry and flat iron my strands, she only trimmed about an inch, and my strands were moisturized and shiny.

Would I recommend the MHM?

In spite of the long term effects I would still recommend the MHM to those struggling to get their curls to pop. However, I would recommend doing the method for no longer than the initial seven days. Based upon my own experiences long term use of bentonite clay and ACV may have a damaging effect on your strands.

I also still use clay but I do not do so as often. Last weekend was the first time I did a clay mask in at least six months. This time I shampooed my hair first, applied the clay mask, and only allowed it to stay on my hair for five minutes. I do intend to do this once a week for the next few weeks as I am trying to improve curl definition on the sides of my head.

Have you tried the Maximum Hydration Method? What were your results?

Sunday, June 25, 2017

Lola's Back!! (& So am I)


Hello ladies!! It's been AGES since my last post and as you can see I've changed my hair once again. After three years of swearing I would never go natural again, about three months of painstaking decision making, and watching several hours of  YouTube  natural hair videos I decided to transition for 3 months then big chop.


Why I Returned to Natural


I have a lot of hair. A.LOT. And when it is in its natural state it can be overwhelming to handle (even when working in sections). I remember spending hours every Saturday washing, conditioning & styling my hair; re-twisting every night to maintain definition and moisture, never being able to straighten my own hair (I tried once and it took 12 hours), and honestly feeling like my styling options were limited to twist outs. I wanted curls y'all! I'm talking ringlet, Shirley Temple curls, and although I didn't mind using rollers or other styling tools to get those curls, it took hours and I my styling attempts were rarely successful.

After three years styling got to be boring and as I advanced in Corporate America I honestly started to feel uncomfortable being in a room full of straight haired white people with my huge afro. It wasn't until years later that I realized I was only uncomfortable because THEY were. Fast forward to 2016 and after unarmed black man # 567 was gunned down by police I started getting angry and feeling like I needed to make a statement. I no longer cared if I stood out or if my textured hair caused my co-workers discomfort. Wearing my wooly hair was a power play, a way of saying "F-you" to the system and my first step towards liberation and walking in the Truth.


The Transition Process


I transitioned for three months with box braids. Because I was already rocking short hair and I've had a TWA in the past, I wasn't worried about how I would look and the change from relaxed to natural was not a drastic one for me. I decided on a short transition period because I knew I wouldn't like dealing with two different textures over a long period of time and I find the whole idea of transitioning to be too much of a grey area for me, I need a set style to work with.

While my hair was in box braids I 'shampooed' weekly using a bentonite clay mixture that I applied only to my scalp and rinsed thoroughly. I consider this to be by far the best thing I did for my hair because it removed product build up and allowed me to begin my second natural journey with a clean slate. For those of you transitioning or thinking of returning natural I suggest the following:

  • Opt for a short transition rather than an immediate big chop - the first time I went natural I shaved my hair completely off and started fresh. I jumped in head first with products doing what I saw others on YouTube do, this was my biggest mistake. As a result I never learned what products my hair liked or how MY hair actually worked (texture-wise). Transitioning for a few months and truly offering your hair a blank slate will allow you to immediately see the potential of your strands and what you are working with.
  • Bentonite, Bentonite, Bentonite!! - This is a staple in my product regimen and I will honestly probably never use anything else to cleanse my strands. I also credit the use of bentonite clay with curl clumpage and therefore curl definition. My first time as a natural I could not get my hair to clump or curl. I knew that my hair was curly so I could not figure out why I never saw any definition outside of the shower once my strands dried. With continued use of the clay I am beginning to see definition from root to tip without the use of curl defining products like gel.
  • Oil isn't necessarily your friend - One of the things I discovered about my strands is that they are low porosity. I'll do an id-depth post on porosity at a later date, but for a low-po curly, oil can actually further prevent moisture from entering a strand that already struggles to accept it. I would suggest holding off on the use of oil or trying it sparingly and analyzing how your hair truly reacts to it.

 I big chopped in February of this year and haven't looked back. I visit my stylist regularly because I am keeping my hair in short tapered cut for now, and she is constantly commenting on how great my texture looks and asking what products I use. This time around I have been successful in my quest for curls and I love the fact that I can wash and go without matting, knots, extreme shrinkage, and excessive dryness the next day. 

I am super excited about my second go around as a natural, and even more excited to share what I have learned with you all.  I am still trying to perfect my wash and go method and look forward to what I imagine to be infinite (and easier) styling options as I master my strands and learn my texture.

What changes have you made to your hair?

Monday, December 14, 2015

#Shorthairdontcare - My New Look


After several months of debating and countless hours scouring the likes of Instagram, Pinterest and Google for the perfect short crop I finally visited my stylist and had my hair cut. Since starting this blog I have essentially come full circle with my strands - starting at APL after going back to a relaxer from natural hair, growing to MBL, cutting into a Bob, letting the bob hit shoulder length, then chopping it all off.

I have received nothing but positive feedback on my new style, and because it is a cut I have rocked in the past (prior to going natural) I knew it was something I could look good in and be confident about. Even my Mom, who is always completely distraught when I do anything more to my hair than trim the ends, was full of compliments and told me how pretty she thought the cut was. I have gotten several "Halle Berry" references which have been ego boosting :-) (Who doesn't want to be compared to Halle Berry???) and although it has only been a few days I am enjoying the style and not regretting the change at all. 

My confidence with the style comes from having thought long and hard about the decision and choosing a style that I know suits me and that I will not have any issues maintaining. In fact, I went so far as to have my stylist schedule me to relax every four weeks so that I can be sure the style always looks fresh and I feel good wearing it. My stylist also equipped me a few simple styling techniques, having my watch the way she curled each section and gave tips on different looks I could try. Along with the tips she provided the same salon brand foaming wrap lotion and wrap paper she uses to mold and set short styles beneath the dryer. I also purchased a hooded dryer as well as a 1/4 inch flat iron and look forward to my next wash day and re-creating the look on my own. 

I have unfortunately had a few people see my new style and shake their heads while sadly asking "Why did you cut off all your hair?" My response has been "because I am on a hair journey." At one point in my journey length was my focus and once I met my goal I realized how boring that was for me - I basically lived in buns and my hair actually suffered because of it and resulted in the need to cut. It was definitely fun to play with length and to watch my hair grow to lengths I had no idea I could reach, but my styling also became boring and wash days took longer. At this point in my journey I am all about effortless style and minimal wash days. 

I am hoping to keep this short crop for awhile, I would love to play around with the different styles I can achieve while keeping the back tapered and letting the top grow - I am particularly interested in reaching a length where I can wand the top section and rock sort of a chic, curly mo-hawk. As always the health of my strands is my number one priority, so I also look forward to trying new products and starting again from ground zero.

Things to Consider Before a Drastic Haircut


Sometimes a girl just needs a change. Your signature or tried and true look can start to take the turn from fab to drab, leaving you looking and feeling less than spectacular. If you are fed-up with your current style and thinking about changing your look with a new haircut, before you pick up the scissors or head for the salon consider the following.


Can you maintain the style?

Depending on your choice of haircut, maintenance outside of the salon can prove to be difficult. For example, short crops with tapered edges often require more frequent relaxer sessions (think every 4 weeks vs. every 12). Although there is the obvious trade-off on weekly wash-days when it may take all of 45 minutes (including a 15 minute DC & 15 minutes under the dryer) to wash and style your strands, having to visit the salon more often or purchase a home relaxer kit every month may be cause to re-think your style choice.


Do you have the proper styling tools/products?

Shorter hair styles often require different sets of tools and products to maintain the look outside of the salon. For example a short, close crop (a la Halle Berry) would require a good foaming wrap lotion, head wraps to hold the mold, a hooded dryer to form the mold, and a 1/4 inch flat iron to curl and sculpt the style to your liking. If you do not already have the necessary styling tools and products on-hand to maintain your style, or find it may be too expensive to purchase new items, the style may not be the one for you.

Will the style suit your lifestyle/personality?

Do you workout often and find yourself sweating out your style as soon as you achieve it? Are you pressed for time & prefer a style that is more "wash & go" rather than wash, condition, deep condition, moisturize, dry, & style? Are you fun, funky and flirty or conservative and structured? The answers to these and many other lifestyle questions should be considered before you make a decision.

What are your hair goals?

A hair journey can be frustrating at times and we can often feel as if the goals we have set are impossible to reach. If your reasons for cutting your hair are due to the frustration of feeling like you aren't getting anywhere in your journey, I would suggest re-evaluating your hair care practices rather than cutting out of frustration and later regretting your decision. 

Are you absolutely sure about this?

Often times the decision to change our hair can be an impulsive one - born from the frustrations of life & situations we cannot control. If you have not spent at least 90 days pouring over hair styles, trying on wigs, trying different styles with your current length, and looking at women with similar features rocking a similar look, then I would classify the desire to cut as an impulsive one that should be evaluated further.

I love to change my look and I have about 3 styles I rotate throughout a five year period. Although each look is tried and true and I know I will like the way I look, I always consider the five points mentioned above before moving from one style to the next.

What do you consider before changing your look?

Monday, October 19, 2015

14 Day Wand Curls on Blow-dried Hair


 Since I cut my hair to correct the light damage I got from constantly wet-bunning I haven't been following the typical "healthy hair rules". I still deep condition, pre-poo and protein treat my hair on a regular basis but the common no-no across all healthy hair sites is consistent heat use. I am a huge supporter of finding what works for you and sticking with it, so if consistent heat use has your hair growing like a weed then I don't suggest making a change, but I do tend to feel a bit guilty and like I am abusing my strands to some extent when months pass and I haven't taken a break from the flat iron.

So in an effort to ease my guilt I decided to switch things up and ditch the flat iron for what I feel is a less-damaging heat styling tool. I actually stumbled upon this style accidentally one lazy weekend when I didn't feel like spending an hour and a half flat ironing my hair. I went through my typical wash-day routine & made it through to the blow out stage before I realized I didn't feel like putting in the time and effort to style my hair. I had no clue what I was going to do with my hair the next morning, and only had about an hour before Church service started so I grabbed my curling wand and hoped my hair wouldn't turn out a complete mess.

I sectioned my hair into fours (just like when preparing to relax) and worked through one section at a time wrapping 1.5-2 inch sections around the wand and holding them there for about 20 seconds. Because I was going for a more uniform and neat look I wrapped each section in the same direction rather than alternating directions and the entire process took about 35 minutes.

 I loved the finished look and got several complements on the results but I was not sure how to maintain the look throughout the week. My first thought was of the pineapple method but I wasn't sure it would work on my shorter hair or on wand curls, but I knew if I simply put on my bonnet I would wake up with crushed curls, so I gave it a shot. I flipped my head over, secured my hair with a ponytail holder, wrapped my silk scarf around my edges and put my bonnet on top. In the morning I was pleasantly surprised to find my curls were completely in-tact and looked just as good as the day before. It took some doing to get my strands to "lay" the way I wanted them to, but after walking around with my silk scarf loosely tied around my head (think Tu-Pac) for a few minutes my hair laid nicely. I moisturized my hair on the third day by scrunching the product into my hair to prevent disturbing the curls and continued to pineapple each night for 7 days. On the eight day since my hair still looked perfectly fine I decided to give the style a go for another week. I did lightly re-touch some areas with the wand where the curls had completely fallen, but I am thinking this may be my go-to style for the Fall.

I love my hair with some texture and the curling wand on blow-dried hair gives me that perfect slightly wavy texture that I adore. Several co-workers actually asked if I was natural so I was excited to find a style that mimics natural textured hair without actually having to deal with the hassle of my being natural. Aside from the great texture this style allows me to go two weeks without putting heat on my hair, and once I do wash my hair again knowing that I won't be doing double duty with the harsh blow-dryer followed by a flat iron makes me feel a lot better about my hair care practices.


 How are you currently styling your hair?


Saturday, October 10, 2015

Refreshing my Color at Home


This Summer I had my stylist color my hair red using a low volume developer to mitigate the affects of the dye. As we all know reds tend to fade quickly and since my Summer dye-job my hair has faded from a vibrant deep red to a warm reddish-brown. Because I love the shade of reddish-brown my hair has morphed into, instead of having my stylist re-dye my hair I am opting for a temporary red rinse to bring back some of the vibrancy my strands have lost.

Things You Will Need
  • Semi-Permanent Rinse 
  • Moisturizing Shampoo
  • Moisturizing Conditioner
  • Vaseline
  • Olive Oil (Optional)
  • Protein Conditioner (Optional)
  • After Color Sealer (Optional) 
  • Rubber Gloves
  • Relaxer Brush (or Color applicator brush)
  • Color mixing bowl
  • Processing Cap

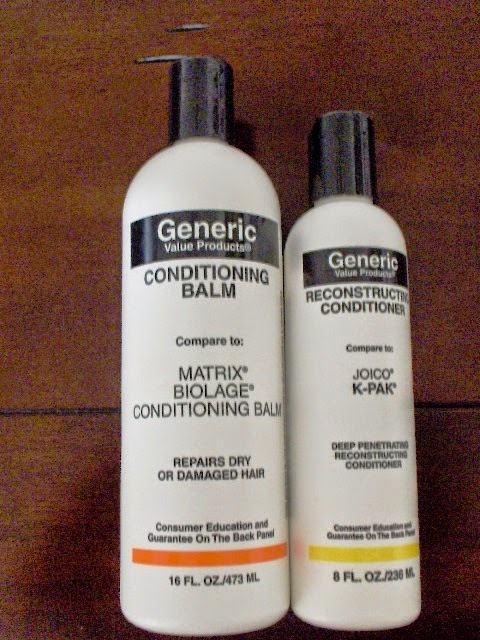
 I first washed and conditioned my hair per my usual wash day routine. I applied a generous amount of Extra Virgin Olive Oil to my dry strands, covered my hair with a plastic cap and allowed the oil to sit for about 45 minutes. I then shampooed using my Kera Minerals Sulfate-Free Shampoo followed by a quick 2 minute condition using GVP Matrix Biolage Conditioning Balm. After t-shirt drying my strands for about 5 minutes I sectioned my hair into fours then applied my Kera Minerals Smoothing Deep Conditioner, covered my hair with a plastic cap and allowed the conditioner to sit for about 2 hours. (I would normally only condition for 15 minutes but because I no longer have a hooded dryer and was caught up doing other things I left the conditioner on longer.) I rinsed the conditioner in warm water to keep my cuticles open in preparation for the color application.


Before applying the dye I protected my hair line and forehead with Vaseline to prevent staining on my skin in case the dye was runny. Using Adore Creative Image Semi-Permanent Rinse in Intense Red I applied the color using an applicator brush (similar to what you would use for a relaxer) beginning at the root and combing the color through to the ends. The application process mirrored that of the relaxer process only I applied the color to the entire length of my strands. I allowed the color to sit for about an hour under a plastic cap to make sure I got the shade of red I was looking for, then rinsed with cool water and followed with another quick shampoo. To seal in the color and make sure my strands were thoroughly conditioned after the process I applied Ion's After Color Sealer and allowed it to sit for five minutes before rinsing with warm water. Once the process was complete I styled my hair as usual.


For those of you with dark hair a rinse may not work for you because it does not truly soak into the cuticles, but rather deposits on top of the strands. I would suggest trying a deep shade of red and allowing the dye to sit a little longer than instructed and also using a hooded dryer to encourage the dye to deposit fully onto the strands. Because my hair had already been lightened by my stylist using permanent color the dye took easily and showed up clear and vibrant.

Have you tried a semi-permanent color at home?

Monday, September 7, 2015

Relaxer Day


Thanks to a really great set of products (second review coming soon) I had one of the smoothest relaxer stretches since transitioning back to relaxed hair. My stretch was so smooth I hardly realized how long it had been since my last relaxer (May 23rd) and by the time I noticed I was in need of a touch up the only opening in my stylist's schedule was a late Friday evening. 

My usual appointment is Saturday at 3 pm and because I did not have Saturday morning to prepare I completely forgot to prep my scalp and lengths. I had also been scratching ( I have a section that itches terribly once I pass the 10 week mark in my stretch), but fortunately the first thing my stylist did was base my scalp with a professional scalp protectant.

After separating my strands into four quadrants she proceeded to apply Affirm Fiberguard Relaxer in Mild, smoothed minimally and only allowed the relaxer to sit for about 3 minutes to retain a bit of texture. She then rinsed my relaxer for about 5 minutes using warm water before shampooing with a moisturizing, neutralizing, PH-balanced shampoo. One of the things I love about my stylist is the fact that she is not afraid to try new products and she has a great sense of what I like even without my having to say anything. My last relaxer she used a Affirm shampoo and protein based conditioner and although I did not mention this to her I really did not like the way my hair felt afterwards - it had that typical plastic feel that I usually experience after a box relaxer. 

This time she used a product line called BASIC to shampoo and condition my strands after rinsing out the relaxer. I admit she did not do a mid-step protein treatment but she did use a great protein-moisture balanced conditioner that left my hair both soft and strong. Unfortunately I did have some tingling on my scalp in the area where I had scratched, but there was no scabbing or scarring.

Moving forward I will be taking extra precautions to protect the sensitive area and I will also be experimenting with a few items to see if I can but an end to the extreme itchiness.

How was your last relaxer?


Friday, July 31, 2015

Keep It Simple: A Simple Regimen for Beginners (With Product Suggestions)


A hair regimen does not need to be elaborate or full of expensive products to be effective. Since my big chop I've taken my hair care back to basics and eliminated processes and products I've found to be unnecessary on my journey to healthy hair. If you are starting a hair journey or just looking to simplify your current regimen the processes and products below may be just what you need to jump-start your journey and see the health and length gains you've been waiting for.


Weekly

Currently I shampoo my hair once per week using a sulfate-free shampoo. I prefer a sulfate-free shampoo because my hair is color treated, however, I have found that a well formulated shampoo containing sulfates can work wonders on my strands. I always follow up my shampoo with either a moisturizing or protein conditioner depending upon my hair's needs and how I plan to style for the week. If I am using hot tools I use both a moisturizing and protein conditioner, but if I will be roller setting I skip the protein and opt for a thick moisturizing conditioner.

Leave-Ins are an important step in your wash day routine and aid in not only the addition of moisture to your strands, but seals that moisture into your strands. I prefer to apply my leave-ins in sections to ensure that each strand is covered. I do not use a comb until leave-ins are applied, this prevents more hair fall and breakage than necessary since my strands are conditioned and slippery. At this point a wide-tooth comb will glide effortlessly through my hair. Your styling choice for the week should dictate your choice of leave-in; if I am allowing my hair to air dry or doing a roller set I opt for thick and creamy leave-ins full of moisturizing properties. However if I am using hot tools I go for light protein-moisture balanced leave-ins.


Daily

The daily handling of your strands should depend upon both your style choice of the week and how your hair feels at the end of the day. At one point I was moisturizing my hair daily, and although this practice is common and not generally harmful it proved to be unnecessary for me as my hair stayed moisturized for at least three days at a time. If I am wearing my hair straight for the week I reapply a dime sized amount of my creamy leave-in conditioner followed by a pea-sized amount of coconut oil to seal. When my hair has been roller set or air dried I lightly mist my strands with my protein-based leave-in and seal with a few drops of coconut and olive oil.

3 Months

Every 12 weeks I visit my stylist and receive a relaxer and trim if necessary. I have found that having a professional apply my relaxer ensures even coverage and a uniform texture from root to tip. My hair is currently telaxed, meaning I purposely have my stylist under-process my strands to maintain a bit of texture. I make sure to have my stylist do a mid-step protein treatment and follow up with a moisturizing deep conditioner. Prior to seeing my stylist on relaxer day I make sure to thoroughly detangle my strands and apply an oil of choice to the length of my strands to protect against relaxer run-off. 

The following are all products I have tried & found to be effective at cleansing and conditioning my hair, and leaving it moisturized and soft:

Shampoos
  • Kera Minerals Smoothing Sulfate Free Shampoo
  • L'Oreal Total Repair 5 Restoring Shampoo
  • Organix Hydrating Macadamia Oil Shampoo
Conditioners 
  • Kera Minerals Smoothing Deep Conditioner
  • Matrix Biolage Conditioning Balm (GVP Brand)
  • Organix Hydrating Macadamia Oil Conditioner
  • Garnier Fructis Damage Eraser Strength Reconstructing Butter
  • Aphogee Kerating 2 Minute Reconstructor
Leave-Ins
  • ORS Oil Moisturizing Hair Lotion
  • Jane Carter Solution Revitalizing Leave-In Conditioner
  • Aphogee Kerating & Green Tea Reconstructurizer
  • Organix  Argan Oil of Morocco Penetrating Oil
  • Kera Minerals Smoothing Leave-In Conditioner
  • Aphogee Pro-Vitamin Leave-In Conditioner
Sealants
  • Olive Oil
  • Coconut Oil 
  • Proclaim Glossing Polish
I neglected to list or mention the use of a heat protectant because I use conditioners containing 'cones which are scientifically proven to coat the hair and protect against high temperatures. In addition to conditioners I also use leave-ins that are clearly defined as providing protection from heat styling tools, this eliminates the need for traditional heat protection sprays. 

A hair journey does not have to be intimidating or time consuming. With these simple products and tips you too can be on your way to healthy hair.

For in depth reviews of the products listed check out my Product Review section.

Monday, July 13, 2015

I Big Chopped


Some times you have to start over. At least that's what I told myself six weeks ago sitting in my stylist's chair trying to mentally prepare myself for this cut. My hair had been growing just fine and despite the slight breakage I received from the Spring Wet Bun Challenge I was still well on my way to waist-length strands, but I wasn't satisfied with the overall health of my tresses.

Maybe it was the 3 months of bunning or the addition of the color, but I was just dissatisfied with my hair. I felt it looked dull and lifeless and needed an infusion of style. I also hated the amount of split-ends I was seeing (even after trims) and the lack of uniformity in texture from root to tip of my strands was driving me nuts. 

With this new cut I am taking it back to the basics and keeping things simple. Because of my length and texture I will be using hot tools rather than roller setting or twist outs, but I am confident that I can retain length and see the level of health I want using minimal heat once per week.

Maybe I am a perfectionist & the level of hair perfection I seek is unattainable but I felt I needed a fresh start in order to have the healthy hair I envision.

How has your hair changed this year?

Friday, June 12, 2015

The Cause of My Breakage


I have been meaning to write this post for weeks but have been busy with other things. I visited my stylist about three weeks ago for some routine maintenance and got a chance to ask her about the breakage I was suffering. As it turns out my theory was correct and the breakage was due to the buns I had been wearing. My stylist noticed that I had another area of breakage in the exact spot on the opposite side of my head, and there was a thin line of broken strands across the base of my hair - exactly where the ponytail holder would meet my strands. 

My stylist offered the following tips to minimize breakage:

Cut back on buns
Although protective styling can be beneficial for lenght gains, as with anything too much can end up having a negative effect. She suggested I bun 3 days out of the week or find other protective styles that hide my ends.

Make sure hair is well oiled & moisturized prior to bunning

I though my hair was moisturized given that I was bunning on freshly washed (or co-washed) strands, after applying leave-ins. What I was not doing was using a creamy moisturizer or heavy oil to seal. My stylist suggested the use of a quality creamy moisturizer and at least a dime sized amount of oil to seal.

Use Satin or Silk covered ponytail holders

I was using covered elastic bands without the metal as I thought this was enough to prevent breakage, this is not the case. From now on I will be using satin or silk covered elastics to secure my strands.

Overall the breakage I am seeing is quite small but it really got me thinking about my focus and my hair practices. For the past year my goal has been length retention rather than health. This setback was exactly what I needed to change my focus and remember what is important.

Have you experienced breakage from buns and ponytails? How did you bounce back?


Monday, May 18, 2015

Kitchen Beautician: A Semi-Homemade Strengthening & Moisturizing Deep Conditioner


 After discovering I had some breakage a few weeks ago I took some time to re-evaluate my hair as well as my hair care practices. I reasoned that there were a few things I was doing that weren't considered damaging - but that could cause damage when not done correctly. For example I would moisturize & seal my hair nightly but I did not section my hair before doing so, I simply slathered moisturizer and my sealant over my strands - inevitably leaving some strands out of the equation (which could lead to dryness and breakage). I followed this same method for all product applications, including my conditioner.

Also because my hair is both color treated and relaxed my primary focus has been moisture, moisture, moisture. I was so caught up in combating dryness via moisturizing products that I forgot the key role of protein in the battle. In my quest for both strong and moisturized hair I took a little trip down memory lane to my days as a natural & how I would often mix my own moisturizers and deep conditioners. I dyed my hair even as a natural and dryness & breakage were never an issue (although I was plagued by split-ends and split-middles) & I reason that this was due to the fact that my hair was stronger and more thoroughly moisturized (I also moisturized in sections at the time). 

I came up with the following deep conditioner that will be my go-to recipe until my hair is restored (or I see it is no longer working):

  • 2 Tbs conditioner (preferably a reconstructor)
  • 1 tsp Honey
  • 1 tsp Olive Oil
  • 1 tsp Coconut Oil

Heat the oil in a hot water bath for 2 minutes prior to adding to the conditioner and honey mix. Section hair into 4 quadrants and apply the conditioner from root to ends using a relaxer brush for even coverage.
Cover strands with a processing cap and let sit for 45 minutes to 1 hour.
Rinse with luke-warm water to remove all product and follow with cool water to seal cuticles.

You may need to adjust the ingredients to suit your hair's length and thickness, but the hair should be completely saturated with the conditioning mix. I have used this DC for 3 weeks now using 3 different conditioners as well as different processing times - it may take a few tries before you find a method that works for your strands. I have noticed that I can easily forgo a day of co-washing without my strands feeling like straw and I have not noticed any new areas of breakage. It is still a little early to tell if I have completely eliminated the breakage problem, but I will keep you all posted on my progress.


What is your go-to deep conditioner for strength and moisture?


Saturday, May 2, 2015

Dealing With Breakage


Just when I thought I had reached my ideal state of healthy hair & I could cruise through the Spring & Summer months I part my hair and find breakage has once again reared it's ugly head. Since I have a few things working against me at the moment (texlaxed, color treated & bunning constantly) I am not exactly sure of the cause of the breakage at this point.

 The position of the breakage (with the bone straight pieces) indicates the breakage is due to the difference in the textures, one area being texlaxed (more like severely under processed) and the ends being virtually bone straight. 

I have also been bunning constantly which is known to cause breakage where the ponytail holder meets the hair - the position of the breakage is exactly where the ponytail holder would wrap around my strands. 
The fact that my hair is both relaxed and colored and therefore extremely dry also contributes to the breakage factor.


I have an appointment with my stylist in about 2 weeks for a relaxer and trim and I am hoping she can pinpoint the exact cause of the breakage, but until then I plan to keep my regimen essentially the same. The only change I plan to make is to bun my hair when it is completely air dried and stretched rather than soaking wet. Hopefully things will not get any worse over the coming weeks and I can come up with a plan to stop the breakage completely and begin nursing the area back to health.

How do you deal with breakage & setbacks?

Thursday, April 23, 2015

The Key to Co-Wash Success


Until recently as a texlaxed girl I have found co-washing to be pointless & not at all beneficial to my strands. Each time I would attempt to add co-washing into my routine I would end up cutting the practice after a week because I did not like the way it left my hair feeling. Now that I am both relaxed & colored moisture is a must and I am taking every precaution to ward off breakage and maintain the health of my strands - this is where co-washing comes into play.

Since March I have followed my Routine for Damaged Hair which includes co-washing at least 3 times a week. Not only has my hair grown during this time (visible black roots with red lengths) but I have not seen any breakage and split ends are virtually non-existent. I have yet to experience the build-up, mushy strands, and overall feeling of disgust I used to have with co-washing & I attribute my positive experience to the following key factors:

Use a Quality Conditioner
Most women who co-wash prefer to use cheap conditioners that can be bought frequently without damaging the pockets. I'm as spend conscious as the next girl but  I would rather sacrifice a few dollars each month on a quality product than deal with lack-luster strands. For my co-washes I have used two conditioners (1) Matrix Biolage Conditioning Balm & (2) Joico K-Pak. Both of these products contain quality ingredients, do not strip the hair, & rinse cleanly from the strands.

These products are a bit on the pricy side, but Sally's sells the GVP brand that works just as well. Check out my review of the GVP brand here.

Avoid the Scalp
In the past I would co-wash my hair as if I were shampooing, meaning I would apply a bit of the product to my roots and gently massage it in. I thought I was cleansing my scalp since the cheap-y conditioners I was using contained sulfates similar to those found in shampoo; but my itchy, flaky scalp told me otherwise. Now when co-washing I apply product to the ends of my hair and work my way up the strand but avoid applying any product to the roots/scalp area. I have noticed that using my fingers to gently massage my scalp while standing beneath the stream of the shower will loosen any dirt and debris and rinse it away without my needing to apply product. 

Rinse Hair Thoroughly
Several women swear by leaving a bit of their conditioner in - they say this promotes moisturized hair. For me, if conditioner is not completely rinsed my hair is left feeling coated and sticky rather than clean & refreshed. I found that conditioners like V05 did not rinse easily which left me with limp strands and product build up. Rinsing completely helps combat product build-up which can lead to any number of hair issues.

Use A Quality Shampoo Once Per Week
It is no secret that frequent co-washing can lead to product build up. Using a quality shampoo to completely rid strands of any excess product is a must for anyone who co-washes with regularity. I would recommend using a good clarifying shampoo at least once a month, but because my hair is colored and I do not want to cause fading I opt to shampoo with a well formulated sulfate shampoo monthly and sulfate-free shampoos in-between.

Co-washing with the right method and conditioner has changed my perspective on the practice. I can't say this is something I would do if I were not texlaxed and colored, but for those of us with extremely dry and/or damaged hair co-washing can work miracles.

What is your favorite co-wash conditioner?

Thursday, April 16, 2015

Product Review: Organix Macadamia Oil Shampoo & Conditioner


Price: $5.99/ea
Purchased at: Target
Product Claims:  "Nutrient-rich macadamia oil + exotic sugar cane extract + bamboo extract = one ultra- moisturizing formula. When your hair is parched, this yummy blend will bring back the shine."
Ingredients: (Shampoo) Water, Sodium C14 16 Olefin Sulfonate, Cocamidopropyl Betaine, PPG 2 Hydroxyethyl Coco/Isostearamide, Sodium Cocoyl Isethionate, Glycol Distearate, Macadamia Ternifolia (Macadamia) Seed Oil, Saccharum Officinarum (Sugar Cane) Extract, Bambusa Vulgaris (Bamboo) Extract, Hydrolyzed Keratin, Theobroma Cacao (Cocoa) Seed Butter, Cocos Nucifera (Coconut) Oil, Persea Gratissima (Avocado) Oil, Aloe Barbadensis Leaf Extract, Panthenol, Dimethicone, Laureth 4, Laureth 23, PEG 12 Dimethicone, PEG 23M, Polyquaternium 10, PEG 150 Pentaerythrityl Tetrastearate, PEG 6 Caprylic/Capric Glycerides, Sodium Chloride, Tetrasodium EDTA, Diazolidinyl Urea, Iodopropynyl Butylcarbamate, Citric Acid, Fragrance, Yellow 5 (CI 19140), Red 40 (CI 16035), Blue 1 (CI 42090)
(Conditioner) Water (Aqua), Cetearyl Alcohol, Cetyl Alcohol, Behentrimonium Chloride, Glycerine, Glycol Distearate, Glycol Stearate, DMDM Hydantoin, Ceteareth 20, Isopropyl Alcohol, Aloe Barbadensis (Aloe Vera) Leaf Extract, Cocos Nucifera (Coconut) Oil, Macadamia Ternifolia (Nut) Seed Oil, Hydrolyzed Keratin, Dimethicone, Bambusa Vulgaris (Bamboo) Extract, Theobroma Cacao (Cocoa) Seed Butter, Persea Gratissima (Avocado) Oil, Fragrance, Tetrasodium EDTA, Cyclotetrasiloxane, Methylchloroisothiazolinone, Methylisothiazolinone, Citric Acid, Cyclopentasiloxane, Panthenol, FD&C Yellow 5, FD&C Red 40, FD&C Blue 1

Analysis: The first thing I noticed about this shampoo & conditioner combo was the consistency. The shampoo is quite thick while the conditioner seems a bit on the thinner side - it is far from runny but I was surprised to find the shampoo appeared to be thicker. Both products smell somewhat tropical and almost nutty & the scent tends not to linger. I have used this combo for nearly 3 months now and what I like best is the fact that neither product "clings" to my hair and scalp; both rinse clean and don't leave me with patches of product build up that needs to be repeatedly rinsed or shampooed (with another product) away.


Verdict: Although I was initially shocked by the consistency of the conditioner the thinness allows it to be evenly and easily spread throughout the hair and I find that I get great coverage using a about a quarter sized amount of product. I like that the conditioner contains a bit of protein (Hydrolyzed Keratin) which makes it the perfect choice for those lazy wash days when I don't have a lot of time or energy to do a full DC session with both a protein and moisture based conditioner. The conditioner adds a good deal of slip to the hair enabling the comb to glide through nicely and also eliminates tangles and knots.

Would I recommend this product to a friend?
I would definitely recommend the Organix line, but honestly of the Organix products I have tried thus far this particular line is not a favorite. Compared to some of the other lines the Macadamia Oil does not leave my hair nearly as soft, and I LOVE soft hair. 

Would I repurchase?
Honestly no. Again the Macadamia Oil did not leave my hair nearly as soft as some of the other product lines within the Organix brand & Organix has so many lines I would like to try I cannot see myself repurchasing a product I feel gave average results. 


 Have you tried Organix Macadamia Oil Conditioner & Shampoo?